Creating More Pages Using the Master - Part 2
Creating a Contact Us Page
We're now going to make a page where we'll put our contact details. For added functionality, you might want to look at replacing this with a fully fledged contact us form.
Some potential solutions:
- Build your own contact form using Surface Controllers - https://our.umbraco.com/documentation/Reference/Templating/Mvc/forms or https://umbraco.tv/videos/umbraco-v7/developer/fundamentals/surface-controllers/
- If you're not a programmer you can use the Umbraco built-in package - Umbraco Forms. This has the added benefit editors can also create their own forms https://umbraco.com/products-and-support/forms
Creating a Content-only Contact Page
For now, let's create a content-only contact us page - a page where the user can provide a title and some rich text. This is very similar to our homepage document type at the moment but we're assuming that you'll go and develop this into something very specific (e.g. adding the featured article and other article content blocks).
Go to Settings > Document Types (hover) > ... > + Create > Document Type . Let's create one called "Simple Content Page".
Firstly let's select an Icon - type the word "Content" into the filter and select the document icon. In description type "A simple content page". Click Save.
Now click on the Settings > Templates (hover) > ... and then Reload Nodes to show your new Simple Content Page template that was created automatically with the Document Type. Click on your Simple Content Page node and then the Properties tab. Change the Master template drop down to select value "Master" - this will mean that we'll get the header and footer from the master as we do in the Homepage template.
Click Save then load the Template tab you should see the portion of Razor code has updated to say Layout ="Master.cshtml" if it hasn't updated itself click on a different node and then back again to reload it. Now add the following HTML to the template and click Save.
<div id="main-container">
    <div id="main" class="wrapper clearfix">
        <section>
            <h2>Header goes here</h2>
            <p>Content goes here</p>
        </section>
    </div> <!-- #main -->
</div> <!-- #main-container -->
Figure 30 - Simple Content Page Template HTML
Now let's create a page using our new Document Type and Template - go to Content > Homepage (hover) > ... > Create. Oh but we can't! We'll see an error like that below:
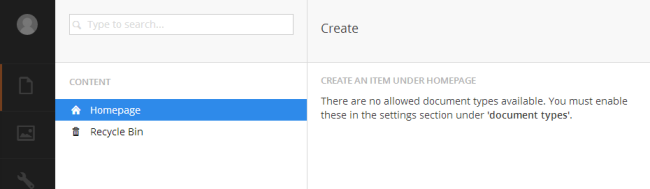
Figure 31 - Umbraco Content Error - No Document Types Available*
This is by design - Umbraco limits the editors to only being able to create content in the places that you, the developer, allow. This will stop a user from breaking a site design (or an entire site) when they create a new homepage under the news container node later! Unfortunately, this functionality also confuses a lot of new Umbracians - hence why we show you this error here.
Go to Settings > Document Types > Homepage on the Permissions screen you'll see a list of Allowed child node types (be careful not to confuse this with the Permissions screen's Allowed templates - we'll cover that later). We need to allow users to be able to create child nodes below our Homepage of type "Simple Content Page". Click Add child and select the Simple Content Page and hit Save.
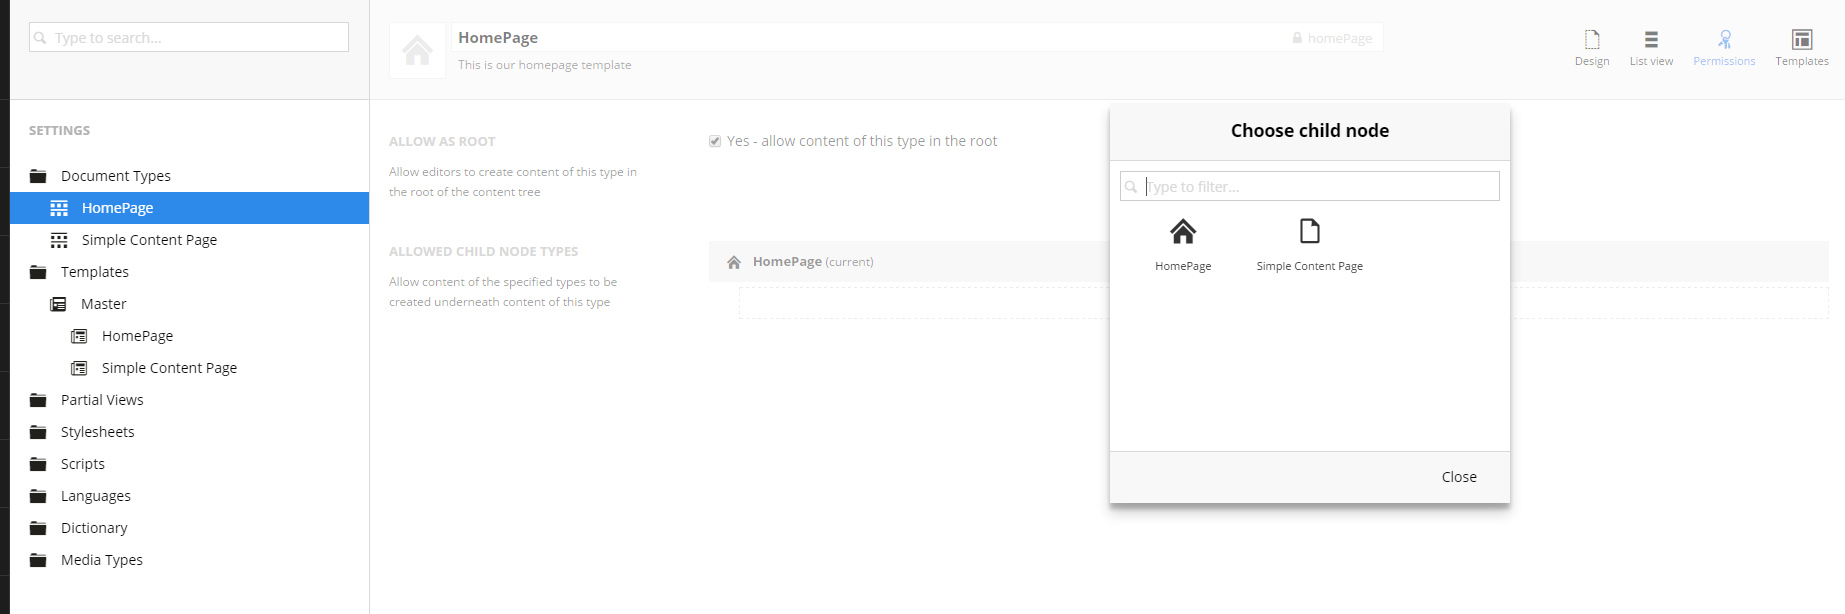
Figure 32 - Homepage - Allowed Child Nodetypes
First we create the Simple Content Page Document Type but after we have to allow it to be created under the homepage document type. Eg. we create our new Document Type but then have to update the Homepage settings to be able to use it. We'll do this again later when we create an Articles container and Article item - we'll need to allow the Article items under the container.
Now go back Content > Homepage (hover) > ... > Create now we have the Simple Content Page! Select this and enter a name (text field at the top) - enter the name "Contact Us". You can see that we only have a Properties tab here - no data properties yet. This is different to the document type for the homepage as we've not yet added any tabs nor data properties (e.g. no bodyText or pageTitle fields to enter content!). Click Save and Publish.
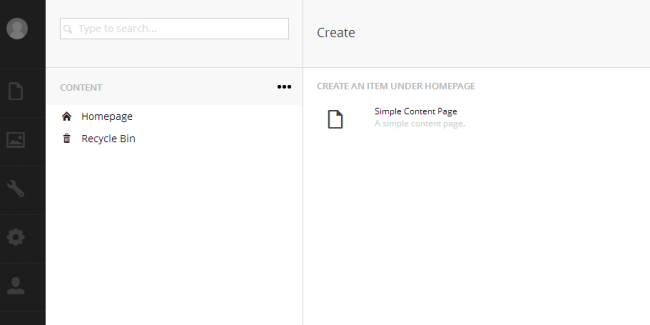
Figure 33 - Creating Our Contact Us Page
Our Content tree will now reload and there will be a Contact Us page under the homepage. This is the recommended structure for most sites - your primary level 1 pages will sit under the Homepage. Go look at this page - if you look at the Properties tab you can see a Link To document row - click this. You might find an unstyled page again. This is because the template designers have assumed that your site will be a flat structure. Eg. all pages sitting at the same level so the browser can't find the CSS or JavaScript at the page level below the homepage. You need to update the Master template to add a leading slash on the JavaScript and CSS source lines.
e.g. change the lines in the Master Template:
CSS
From: <link rel="stylesheet" href="css/style.css">
To: <link rel="stylesheet" href="/css/style.css">
JavaScript
From: <script src="js/libs/modernizr-2.0.6.min.js"></script>
To: <script src="/js/libs/modernizr-2.0.6.min.js"></script>
Save the template changes and reload your Contact Us page. We'll now have a pretty empty looking page.
Let's add two fields - pageTitle (type = Textstring) and bodyText (type Rich Text Editor). Follow the instructions in creating the Homepage document type if you're not sure how to do this. Then wire these fields up - by editing the Template, again follow the Homepage section if this isn't yet second nature to you yet! You'll see in the screenshot we've removed the <p> tags - the rich text editor will add these for us (the textbox field needs the <h2> tags though).
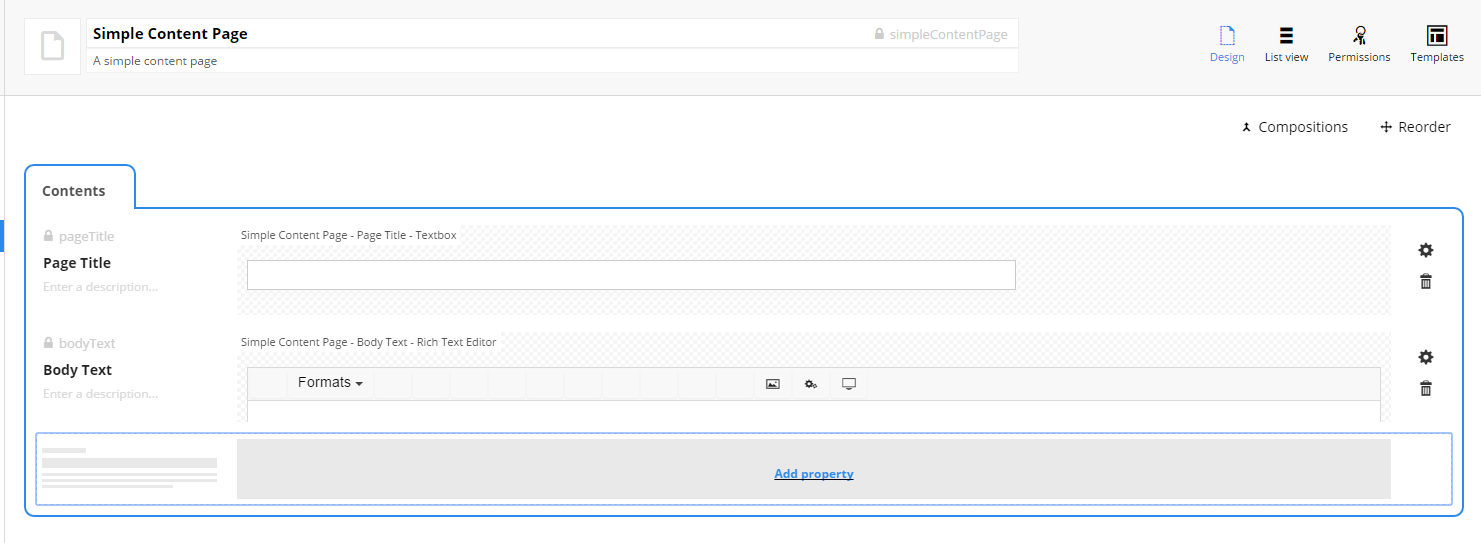
Figure 34 - Simple Contact Page Generic Properties

Figure 35 - Simple Content Page Template with Data Fields
Now add some content under the Content > Homepage node > Contact Us node. Click Save and Publish and you should have a slightly more interesting page when you reload it!
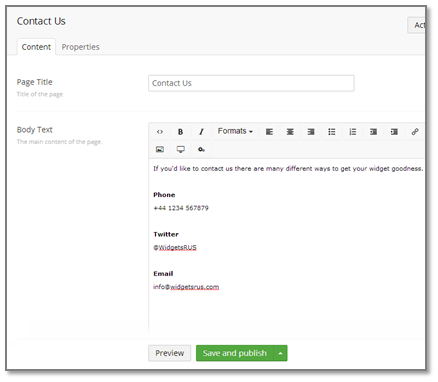
Figure 36 - Contact Us with Some Data
Using Document Type Properties from the Homepage
What you may notice is that the footer is now empty - we don't have our content from our Homepage node. We need to tell Umbraco to get the content from the parent Homepage tab. To do this we edit the template (the Master).
Highlight the Umbraco field in the footer <h3> tags and then click the Insert Umbraco page field button again.

Here is where all of the options we ignored earlier come into play - choose footerText again from the Choose field dropdown but this time we'll check the Recursive checkbox.
This tells Umbraco that if the field doesn't exist at the node level for the page we're requesting it will look up the content tree. So in our example go to the Homepage for this content). This means you could also create a footerText element at the Contact Us page if you wanted the editor to override the site-wide default but for fields like this it's not normally used. Click Insert and you'll see a different bit of Razor is added : @Umbraco.Field("footerText", recursive: true)
Click Save and reload our Contact Us page.
Next - Master Template The Navigation Menu
A solution for the template in the menu.