Cropping images
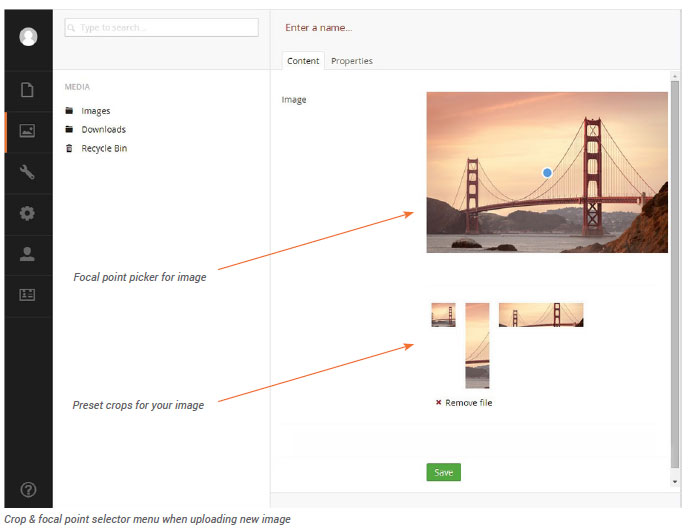
If your system administrator has set up cropping for your images you will see a similar interface within your Media section to the one depicted in the screenshot below. The blue circle in the middle of the image is the default focal point. The focal point defines the primary area or focus of the image which will be the center point of any image re-sizing. You can move the focal point by clicking and dragging it to the desired part of the image. Below the image you may see specific crops of the image depending on your setup. In the example below you can see we have set up three crops.
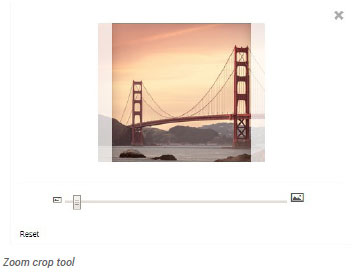
If you are not happy with one of the crops below the image you can manually alter it. After clicking on one of the crops, you will see an enlarged version of the crop, giving you the ability to drag the image around and zoom in or out until you have the desired result. If you wish to reset the crop to the default you can click Reset below the image. Once you are happy with your changes you can click the X in the top right corner of the image to close the crop editor. You can now edit other crops using the method above. After you have finished editing the crops you can click the Save button.