Member registration and login
Using tools available on a fresh install of Umbraco CMS, you are able to create a frontend-based registration and login functions, and restrict access to specific areas of your site based on this system.
By the end of this tutorial you will know how to implement a basic register/login functionality on your website, hide pages from non-logged in members, and assign newly registered members to specific member groups.
Create the necessary macros and partial files
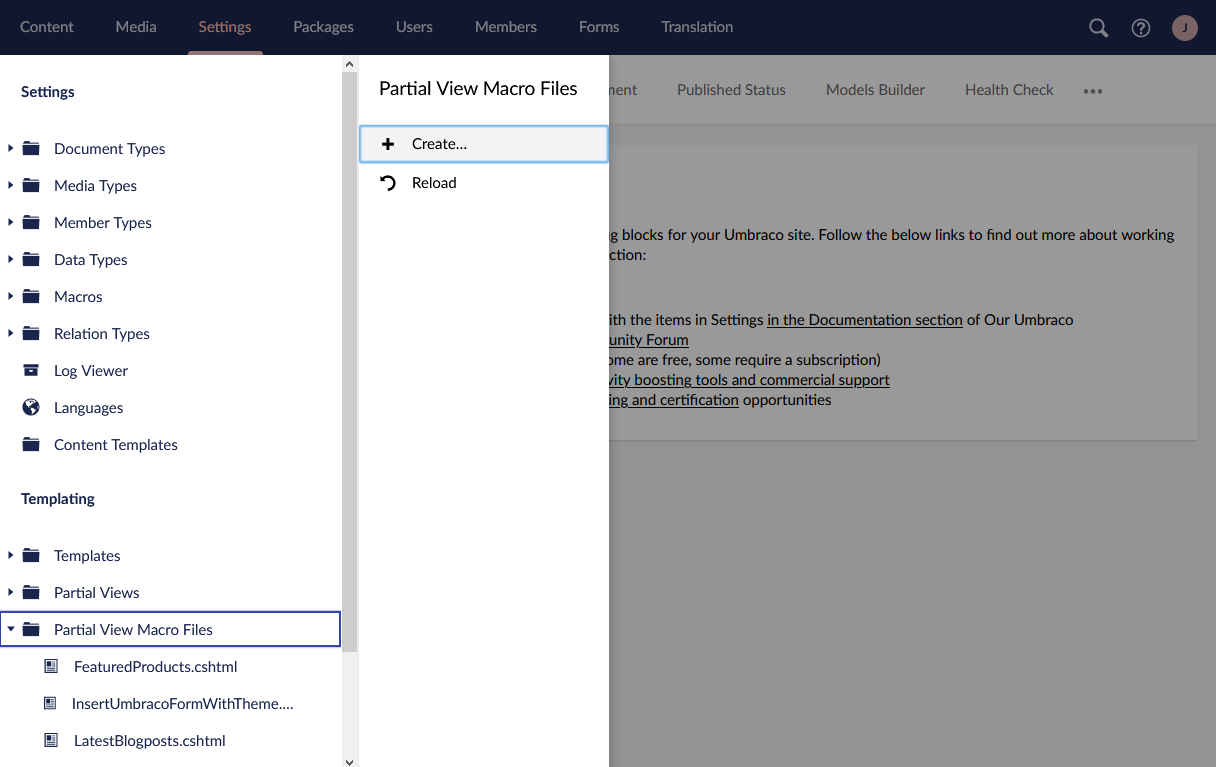
Navigate to the Settings dashboard in the Backoffice, and under Templating section, expand Partial View Macro Files folder and create a new partial view.
Make sure to create this Macro view from available snippets.
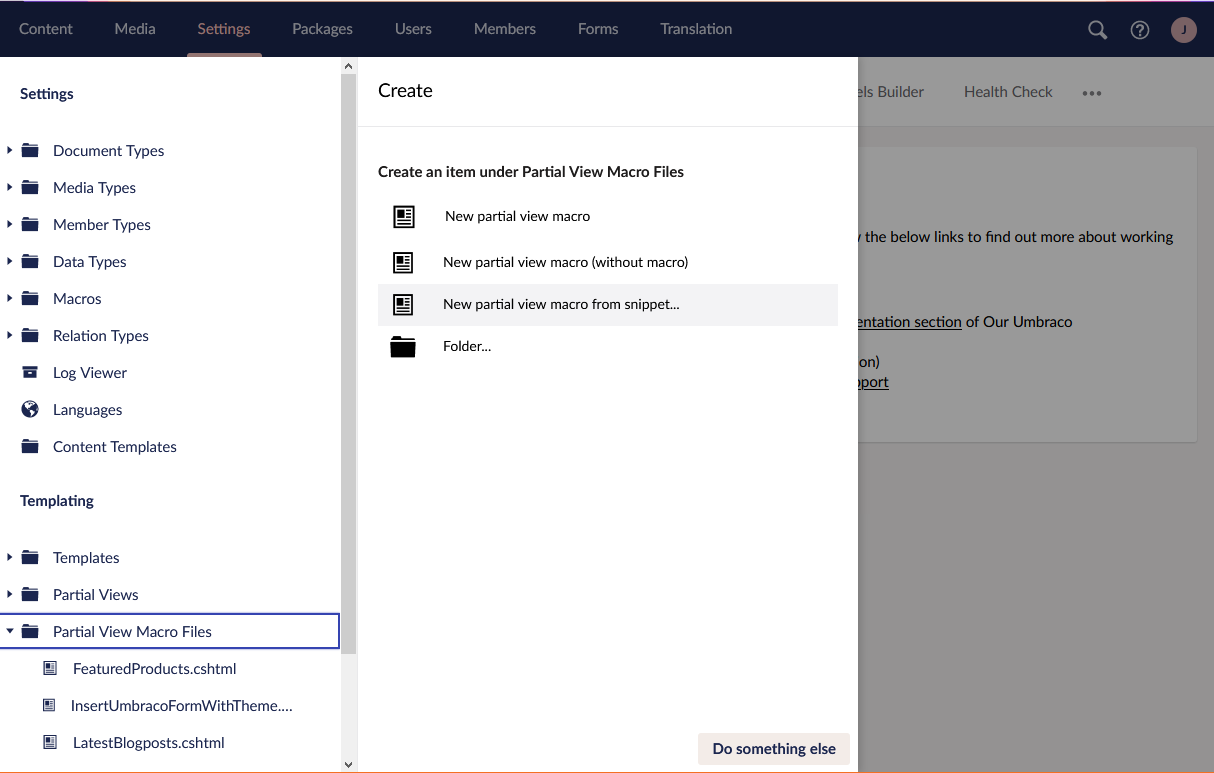
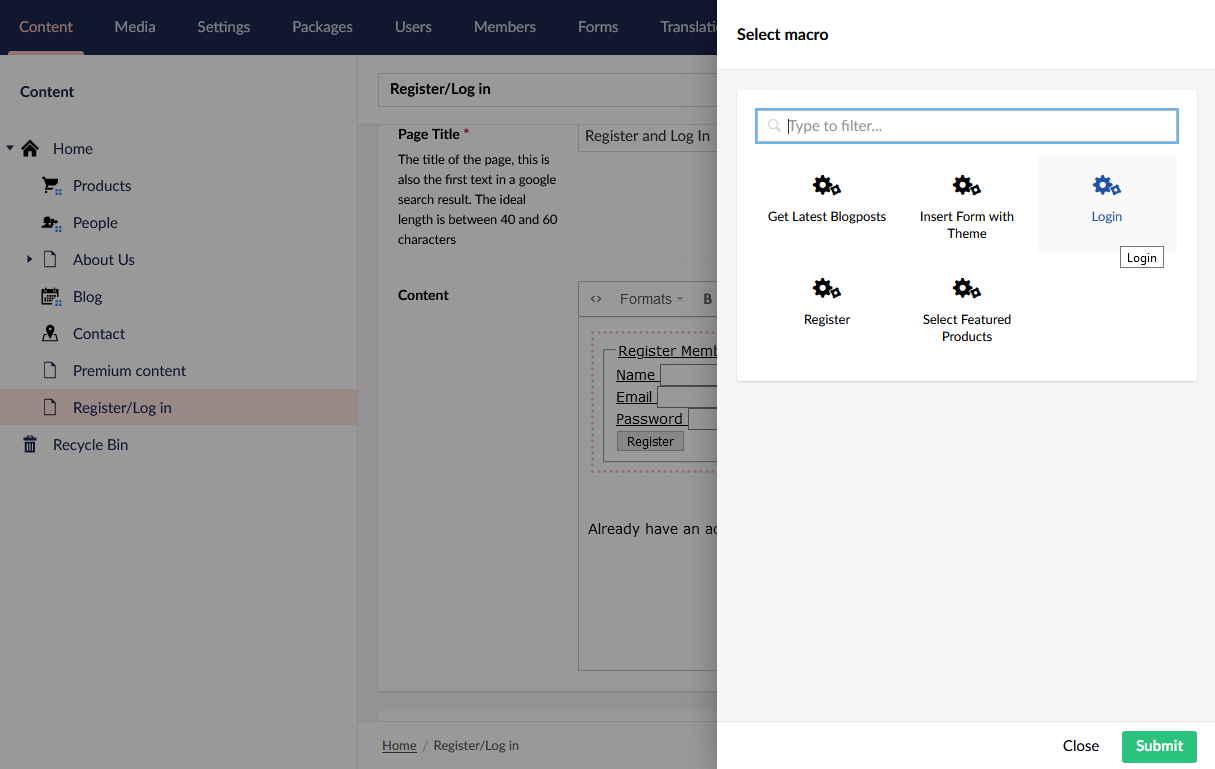
Start with the Register Member snippet.
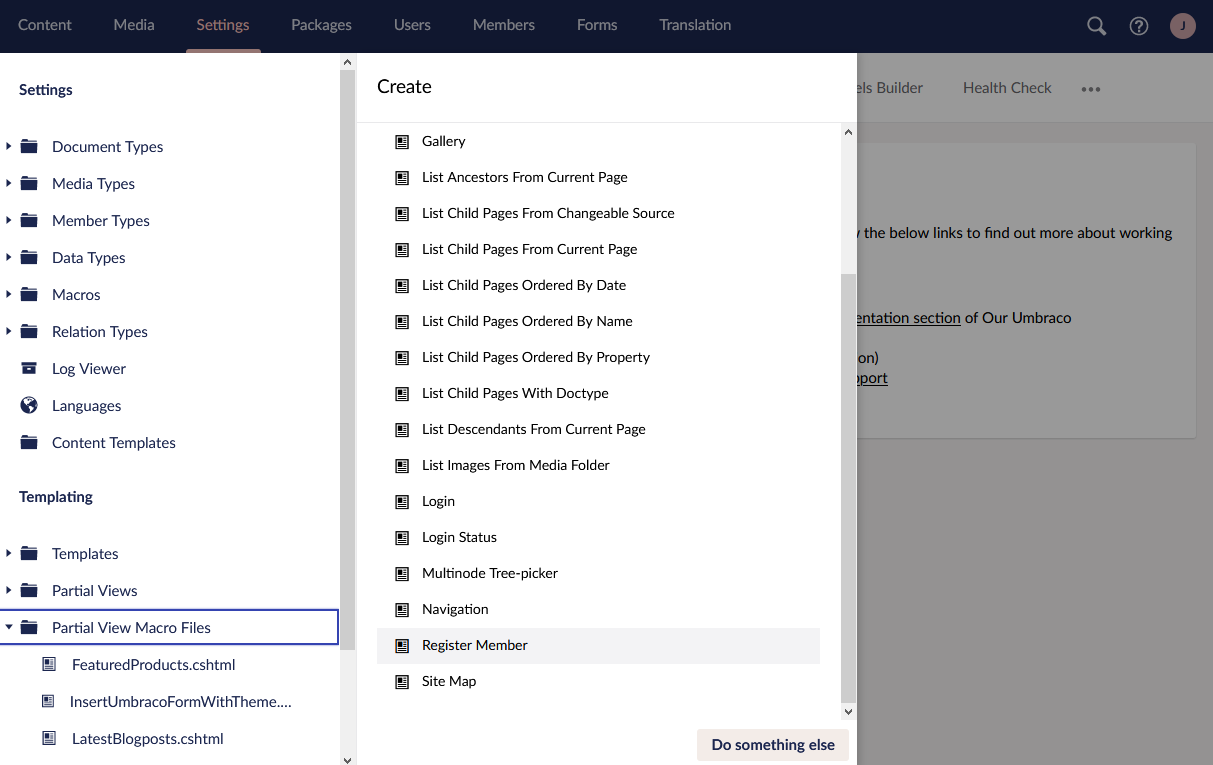
Make sure to fill out the name of the partial view (you can call it "Register", for example). Afterwards, using the same approach, create a Macro Partial View using the Login snippet and name it "Login".
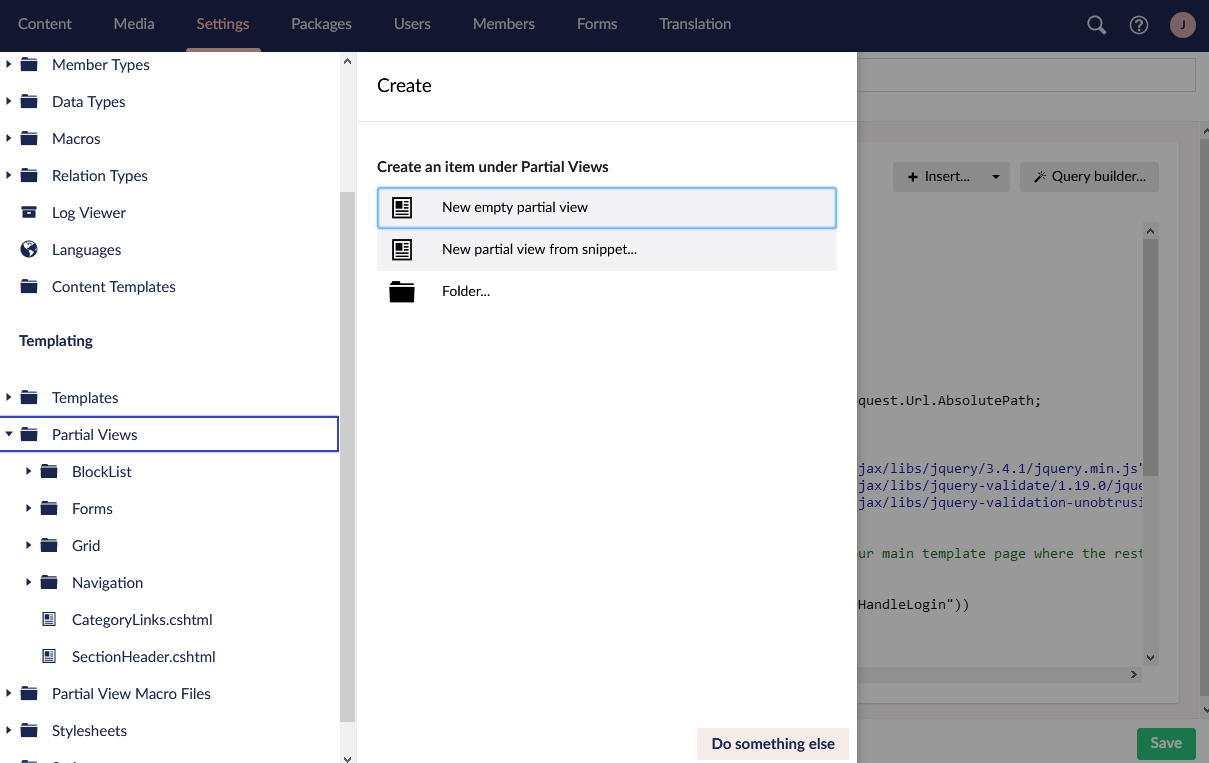
With that done, navigate to Partial Views folder above Partial View Macro Files, and create a New partial view from snippet. This view should be using the Login Status snippet.
These three partials already contain all the necessary code to make the register, login and logout functionality work.
Since the Register and Login were created as macro partials, you will have corresponding Macros with the same names available under the Macros folder above the Templating section. Make sure to expand the Macros view, and in Editor Settings enable Login and Register macros to be used in Richtext Editor and the grid.

Include the Macros and Partials in Content and Templates
Halfway there! Next, navigate to your Content section. Since we created Register and Login partials as macro partials, we can paste them in a Richtext Editor. Create a new page that is using this editor, give it a name (e.g. Login/Signup), and in any RTE or Grid layouts you have on the page, insert a Macro.
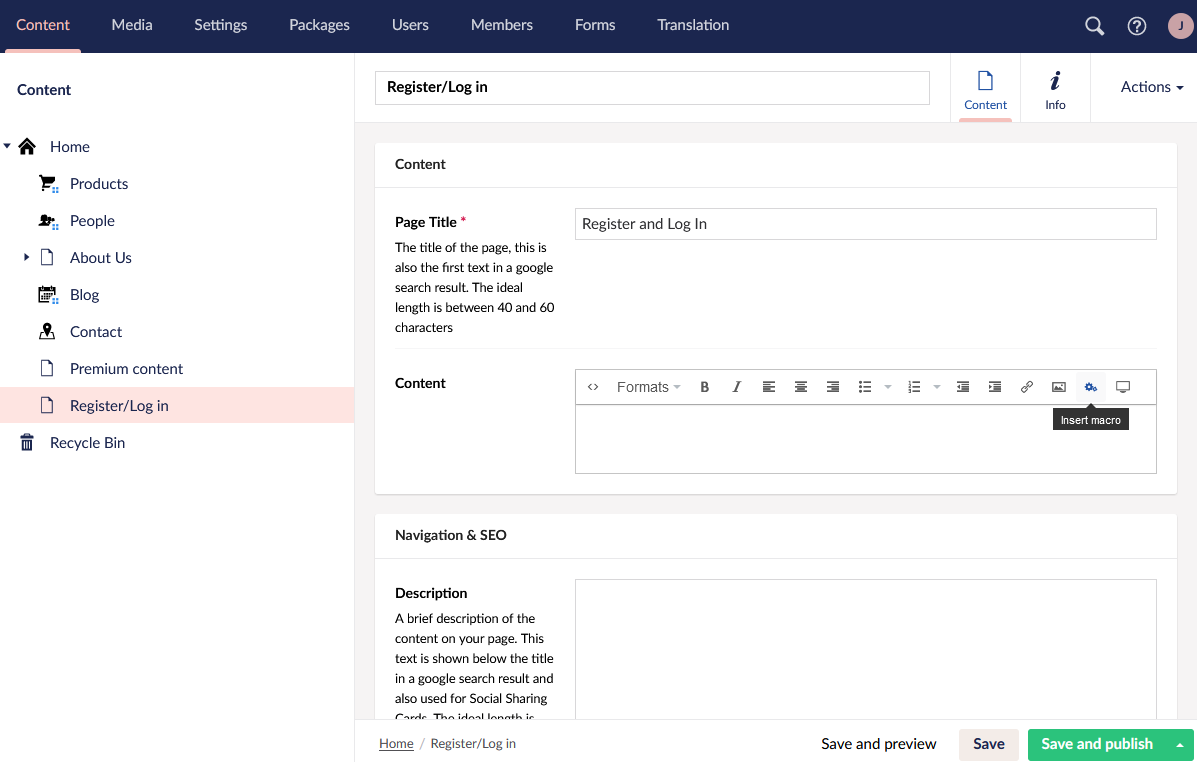
Choose the Macro you created. Depending on how you would like to structure your signup/login pages, you can include one of the macros or place both of them next to each other.
Save and publish the new page. Now the Register/Login functionality should be rendered on the new page you made.

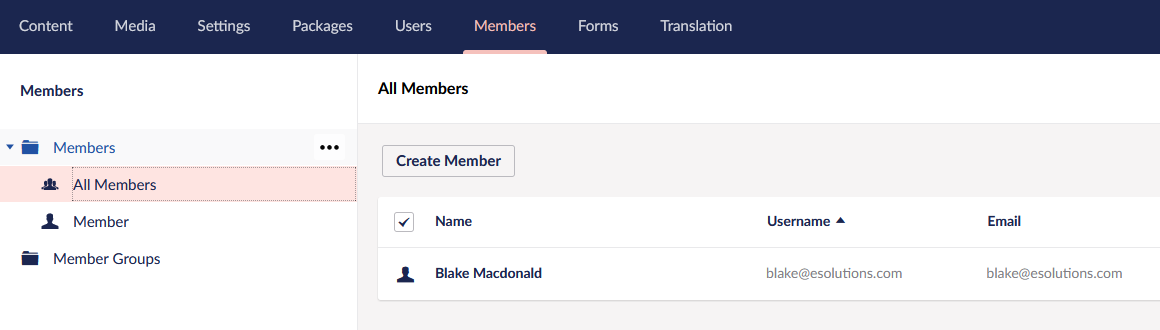
With the above macros in place, you can now use the page to register new Members. Every registered person will show up in the Members section in the backoffice.
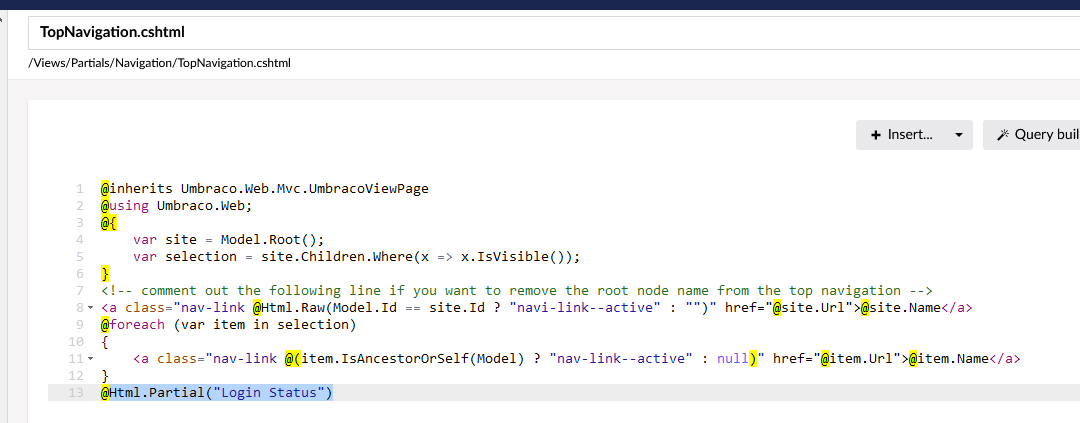
Now, we have our signup and login functionality - though there is one partial view we have not used yet, the Login Status. We created it as a Partial View, not as a Macro, for a singular reason - we are going to include it directly in a template, not in a property editor in the Content section. This partial will show the current status - whether the person is logged in or not.
To insert the partial, type @Html.Partial("") and enter the name of your partial in the quotes.
A good place to put it would be either the Master page, or a navigation component.
With this partial in place, provided we put it in navigation or a layout page, we will be able to see the login status no matter on which page we currently are. It also allows the member to log out. Do keep in mind that you might need to style the partial a bit to make it fit with the rest of the site.

Member-only pages/Restricted access
Now that we have the options to:
- Register a member
- Log in a member
- Check current login status
- Log out a member
We can also go a bit further and specify which parts of our website should be accessible to logged in members. To do this, head on over to the Member section in the Backoffice, and create a new Member Group.

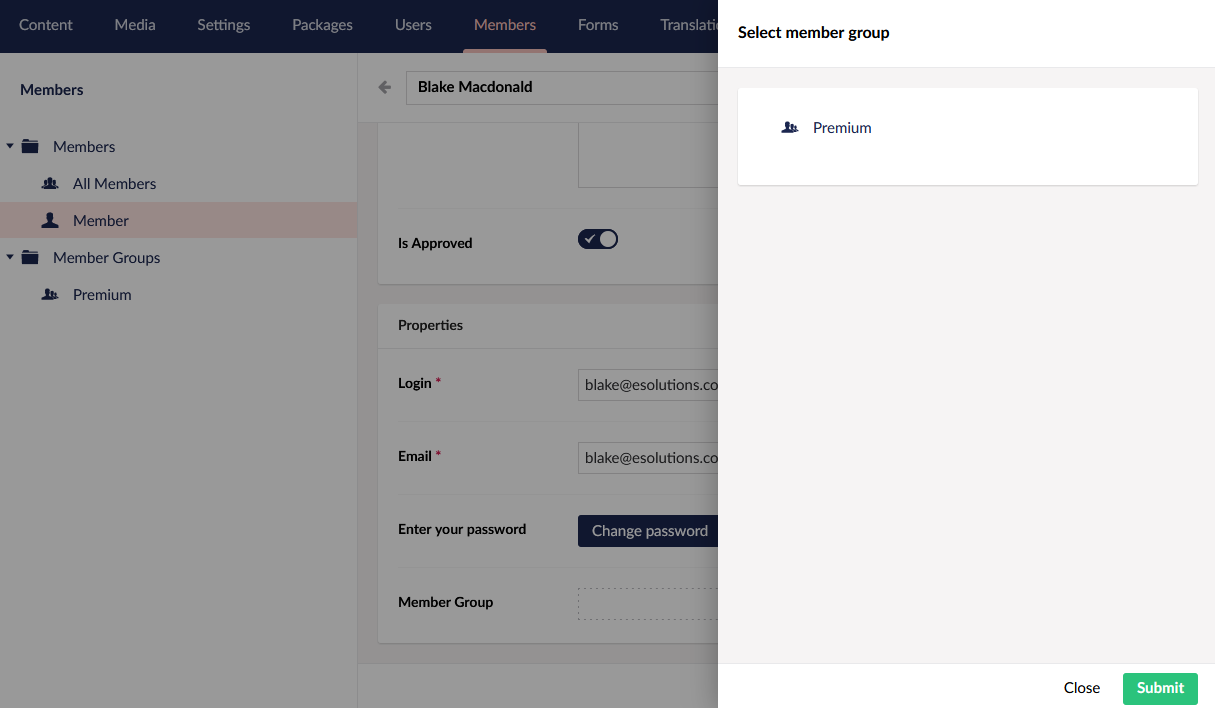
Give the group a name, and save it. Next, move over to the Members folder, click on any of the Members you have, and assign the newly created Member Group to them. In order to do that, click on the member who you would like to assign to the group.
Under Properties, you have the option to pick a group to assign the member to (Member Group property).
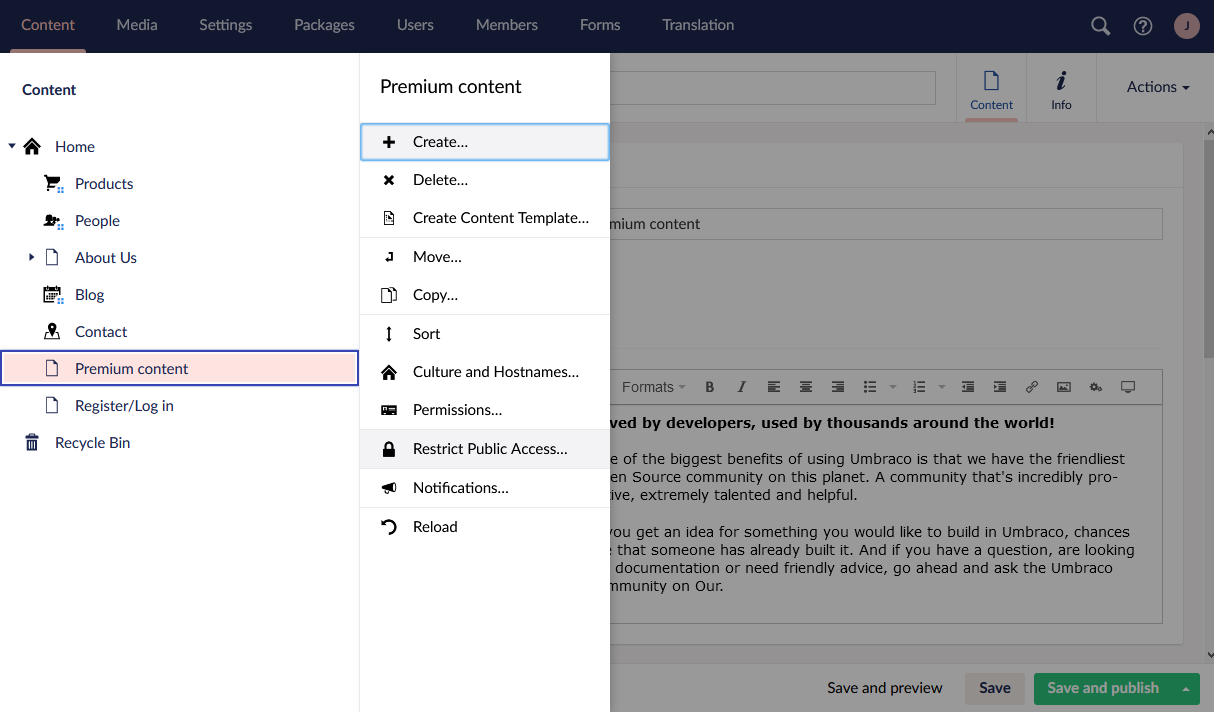
Almost there. Save the member, move to the Content section and find the page you would like to restrict. Right-click on that content node, and find the option "Restrict Public Access".
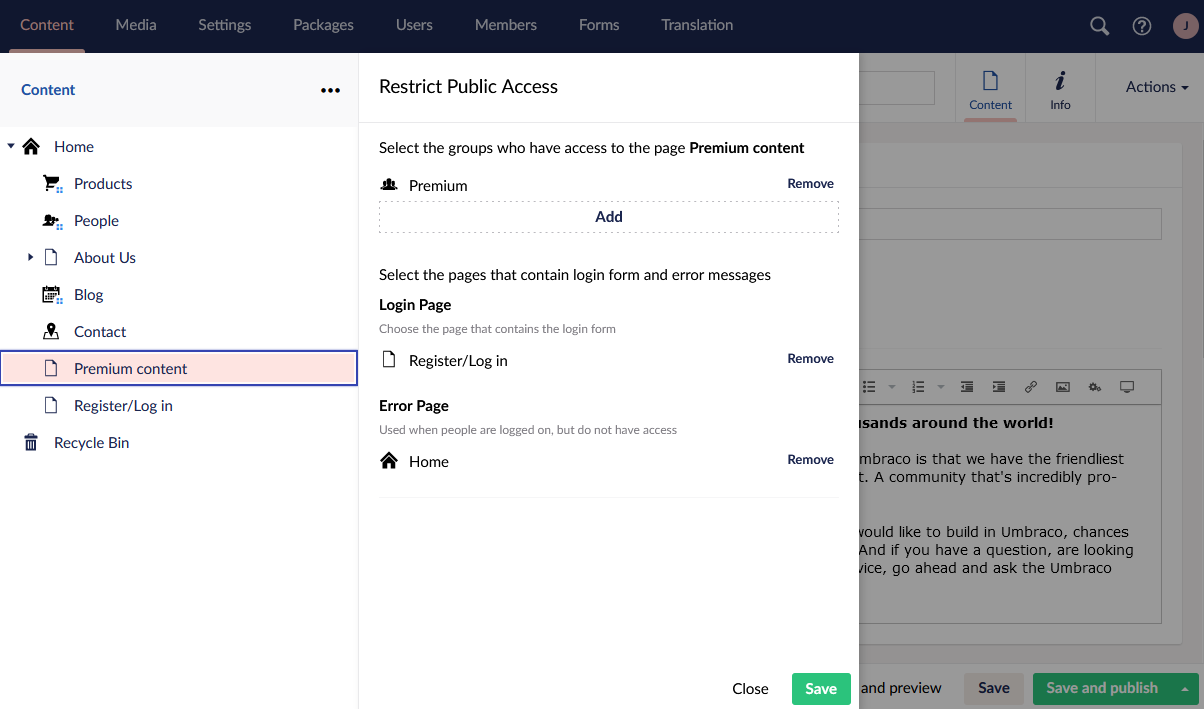
You will be able to restrict access to a specific member, or a specific group. Choose the latter option. On this menu, you will be able to select the group that will have access to the page, the page with the login form, and the page that would be displayed if selected content would be inaccessible to the chosen group.
To restrict access you need to have made a member group, and a page containing the login partial. Having a "No access"/error page is recommended, as well - though you can use any content page you have.
Congratulations! With all of that set up, the page you chose will redirect the user to the Login page if they are not logged in, and if they are logged in - they will be able to see the page's contents.
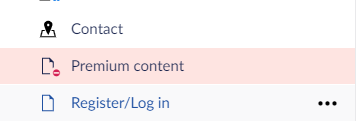
In the navigation, you will be able to tell the content node is restricted - the small red icon that is added on top of the document type icon signifies that.
The above approach relies on two Macro partial views and a non-Macro partial view. It is also possible to achieve the same result by working entirely with plain Partial Views, three Macros, and even plain HTML/Razor code copied from the Snippets into your Templates.
However, with the above approach, members will not be assigned to any group automatically - for this to happen, we would need to write a bit of custom code.
Assigning new members to groups automatically
Creating a new SurfaceController
Since the member saving form is processed in a controller, we can copy the default UmbRegisterController and add a function to assign the newly created member to a group.
using System;
using System.Web.Mvc;
using System.Web.Security;
using Umbraco.Core;
using Umbraco.Core.Cache;
using Umbraco.Core.Logging;
using Umbraco.Core.Persistence;
using Umbraco.Core.Services;
using Umbraco.Web.Models;
using Umbraco.Web.Mvc;

namespace Umbraco.Web.Controllers
{
    public class UmbAlternativeRegisterController : SurfaceController  //to avoid confusion we change the name of the class - in this example we changed it from UmbRegisterController to UmbAlternativeRegisterController
    {
        public UmbAlternativeRegisterController()    //the class name has to be changed in the constructors as well
        {
        }

        public UmbAlternativeRegisterController(IUmbracoContextAccessor umbracoContextAccessor, IUmbracoDatabaseFactory databaseFactory, ServiceContext services, AppCaches appCaches, ILogger logger, IProfilingLogger profilingLogger, UmbracoHelper umbracoHelper)
            : base(umbracoContextAccessor, databaseFactory, services, appCaches, logger, profilingLogger, umbracoHelper)
        {
        }

        [HttpPost]
        [ValidateAntiForgeryToken]
        [ValidateUmbracoFormRouteString]
        public ActionResult HandleRegisterMember([Bind(Prefix = "registerModel")] RegisterModel model, string memberGroup)  //on top of the original controller code we add the memberGroup parameter
        {
            if (ModelState.IsValid == false)
            {
                return CurrentUmbracoPage();
            }

            if (string.IsNullOrEmpty(model.Name) && string.IsNullOrEmpty(model.Email) == false)
            {
                model.Name = model.Email;
            }

            MembershipCreateStatus status;
            var member = Members.RegisterMember(model, out status, model.LoginOnSuccess);

            switch (status)
            {
                case MembershipCreateStatus.Success:

                    TempData["FormSuccess"] = true;
                    AssignMemberGroup(model.Email, memberGroup);
                    if (model.RedirectUrl.IsNullOrWhiteSpace() == false)
                    {
                        return Redirect(model.RedirectUrl);
                    }

                    return RedirectToCurrentUmbracoPage();
                case MembershipCreateStatus.InvalidUserName:
                    ModelState.AddModelError((model.UsernameIsEmail || model.Username == null)
                        ? "registerModel.Email"
                        : "registerModel.Username",
                        "Username is not valid");
                    break;
                case MembershipCreateStatus.InvalidPassword:
                    ModelState.AddModelError("registerModel.Password", "The password is not strong enough");
                    break;
                case MembershipCreateStatus.InvalidQuestion:
                case MembershipCreateStatus.InvalidAnswer:
                    throw new NotImplementedException(status.ToString());
                case MembershipCreateStatus.InvalidEmail:
                    ModelState.AddModelError("registerModel.Email", "Email is invalid");
                    break;
                case MembershipCreateStatus.DuplicateUserName:
                    ModelState.AddModelError((model.UsernameIsEmail || model.Username == null)
                        ? "registerModel.Email"
                        : "registerModel.Username",
                        "A member with this username already exists.");
                    break;
                case MembershipCreateStatus.DuplicateEmail:
                    ModelState.AddModelError("registerModel.Email", "A member with this e-mail address already exists");
                    break;
                case MembershipCreateStatus.UserRejected:
                case MembershipCreateStatus.InvalidProviderUserKey:
                case MembershipCreateStatus.DuplicateProviderUserKey:
                case MembershipCreateStatus.ProviderError:
                    ModelState.AddModelError("registerModel", "An error occurred creating the member: " + status);
                    break;
                default:
                    throw new ArgumentOutOfRangeException();
            }

            return CurrentUmbracoPage();
        }

        //the below method will allow us to assign the member to an already existing group
        private void AssignMemberGroup(string email, string group)
        {
            try
            {
                Services.MemberService.AssignRole(email, group);
            }
            catch (Exception ex)
            {
                //handle the exception
            }

        }

    }
}
For an easier implementation, you can copy the above code to a new .cs file and place it in the App_Code folder in your solution so that it will be compiled on application startup.
With the above controller in place it is time to adjust the macro/view files as well.
Adjusting the Registration partial to use the new controller
In the Backoffice, navigate to the Register partial you created before. Where we would normally be using
    using (Html.BeginUmbracoForm<UmbRegisterController>("HandleRegisterMember"))
    {
        //rest of the snippet code
    }
we have to instead use the custom controller we added, as well as include an anti-forgery token:
 using (Html.BeginUmbracoForm<UmbAlternativeRegisterController>("HandleRegisterMember", new { memberGroup = "Professionals" }))
    {
            @Html.AntiForgeryToken()
        //rest of the snippet code
    }
Make sure to replace UmbRegisterController with the name of the controller you created in the earlier step - in our example, that is UmbAlternativeRegisterController.
We are also passing a member group as a parameter - people who register with this form will be automatically assigned to the "Professionals" member group, assuming it already exists in the Backoffice.