Nested Content
Alias: Umbraco.NestedContent
Returns: IEnumerable<IPublishedContent> (or IPublishedContent depending on configuration)
Nested Content is a new list editing property editor for Umbraco 7.7, using Document Types to define the list item schema. By using document-types, you have the benefit of a reusable UI that you are familiar with and get to re-use all the standard data-types as field editors.
Configuring Nested Content
The Nested Content property editor is set-up/configured in the same way as any standard property editor, via the Data Types admin interface. To set-up your Nested Content property, create a new Data Type and select Nested Content from the list of available property editors.
You should then be presented with the Nested Content property editors data-type editor as shown below.

The data-type editor allows you to configure the following properties:
- Doc Types - Defines a list of document-types to use as data blue prints for this Nested Content instance. For each document-type you can provide the alias of the tab you wish to render (first tab is used by default if not set) as well as a template for generating list item labels using the syntax
{{propertyAlias}}.- If you would like to include the index position in the label, you can use
{{$index}}. - If your property links to a content, media or member node, you can use the Angular filter
{{ pickerAlias | ncNodeName }}to show the node name rather than the node ID. - If your property is a rich text editor, you can use the Angular filter
{{ pickerAlias | ncRichText }}to show the unformatted text.
- If you would like to include the index position in the label, you can use
- Min Items - Sets the minimum number of items that should be allowed in the list. If greater than
0, Nested Content will pre-populate your list with the minimum amount of allowed items and prevent deleting items below this level. Defaults to0. - Max Items - Sets the maximum number of items that should be allowed in the list. If greater than
0, Nested Content will prevent new items being added to the list above this threshold. Defaults to0. - Confirm Deletes - Enabling this will require item deletions to require a confirmation before being deleted. Defaults to
true. - Show Icons - Enabling this will display the item's doc type icon next to the name in the Nested Content list.
- Hide Label - Enabling this will hide the property editor's label and expand the Nested Content property editor to the full width of the editor window.
Once your data type has been configured, set-up a property on your page doc type using your new data type and you are set to start editing.
Editing Nested Content
When viewing a Nested Content editor for the first time, you'll be presented with an icon and help text to get you started.

Click the plus icon to start creating a new item in the list.
If your Nested Content editor is configured with multiple document-types you will be presented with a dialog window to select which document-type you would like to use.
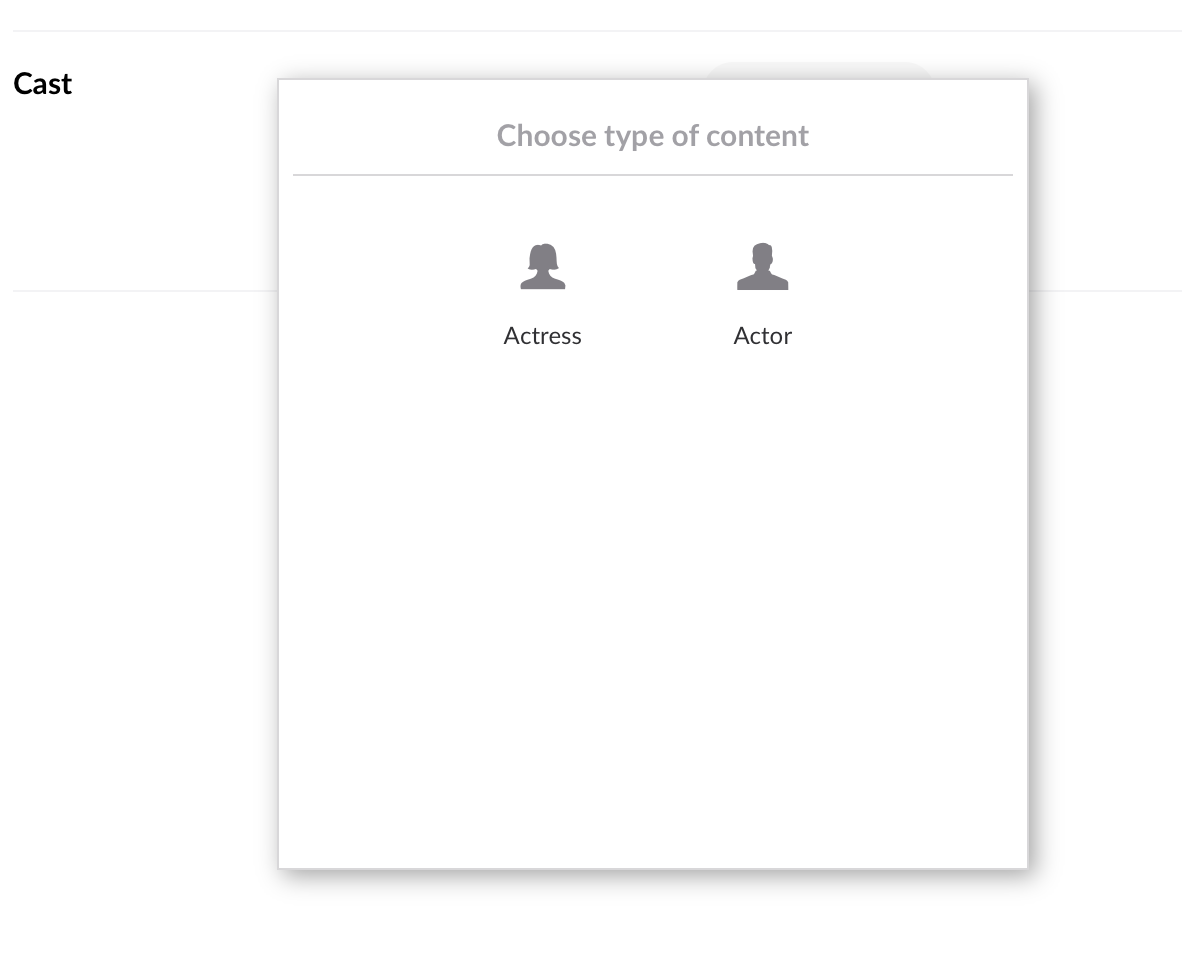
Click the icon of the document-type you wish to use and a new item will be created in the list using that document-type.
If you only have one document-type configured for your Nested Content editor, then clicking the plus icon will not display the dialog and instead will jump straight to inserting an entry in the editor for you ready to edit.
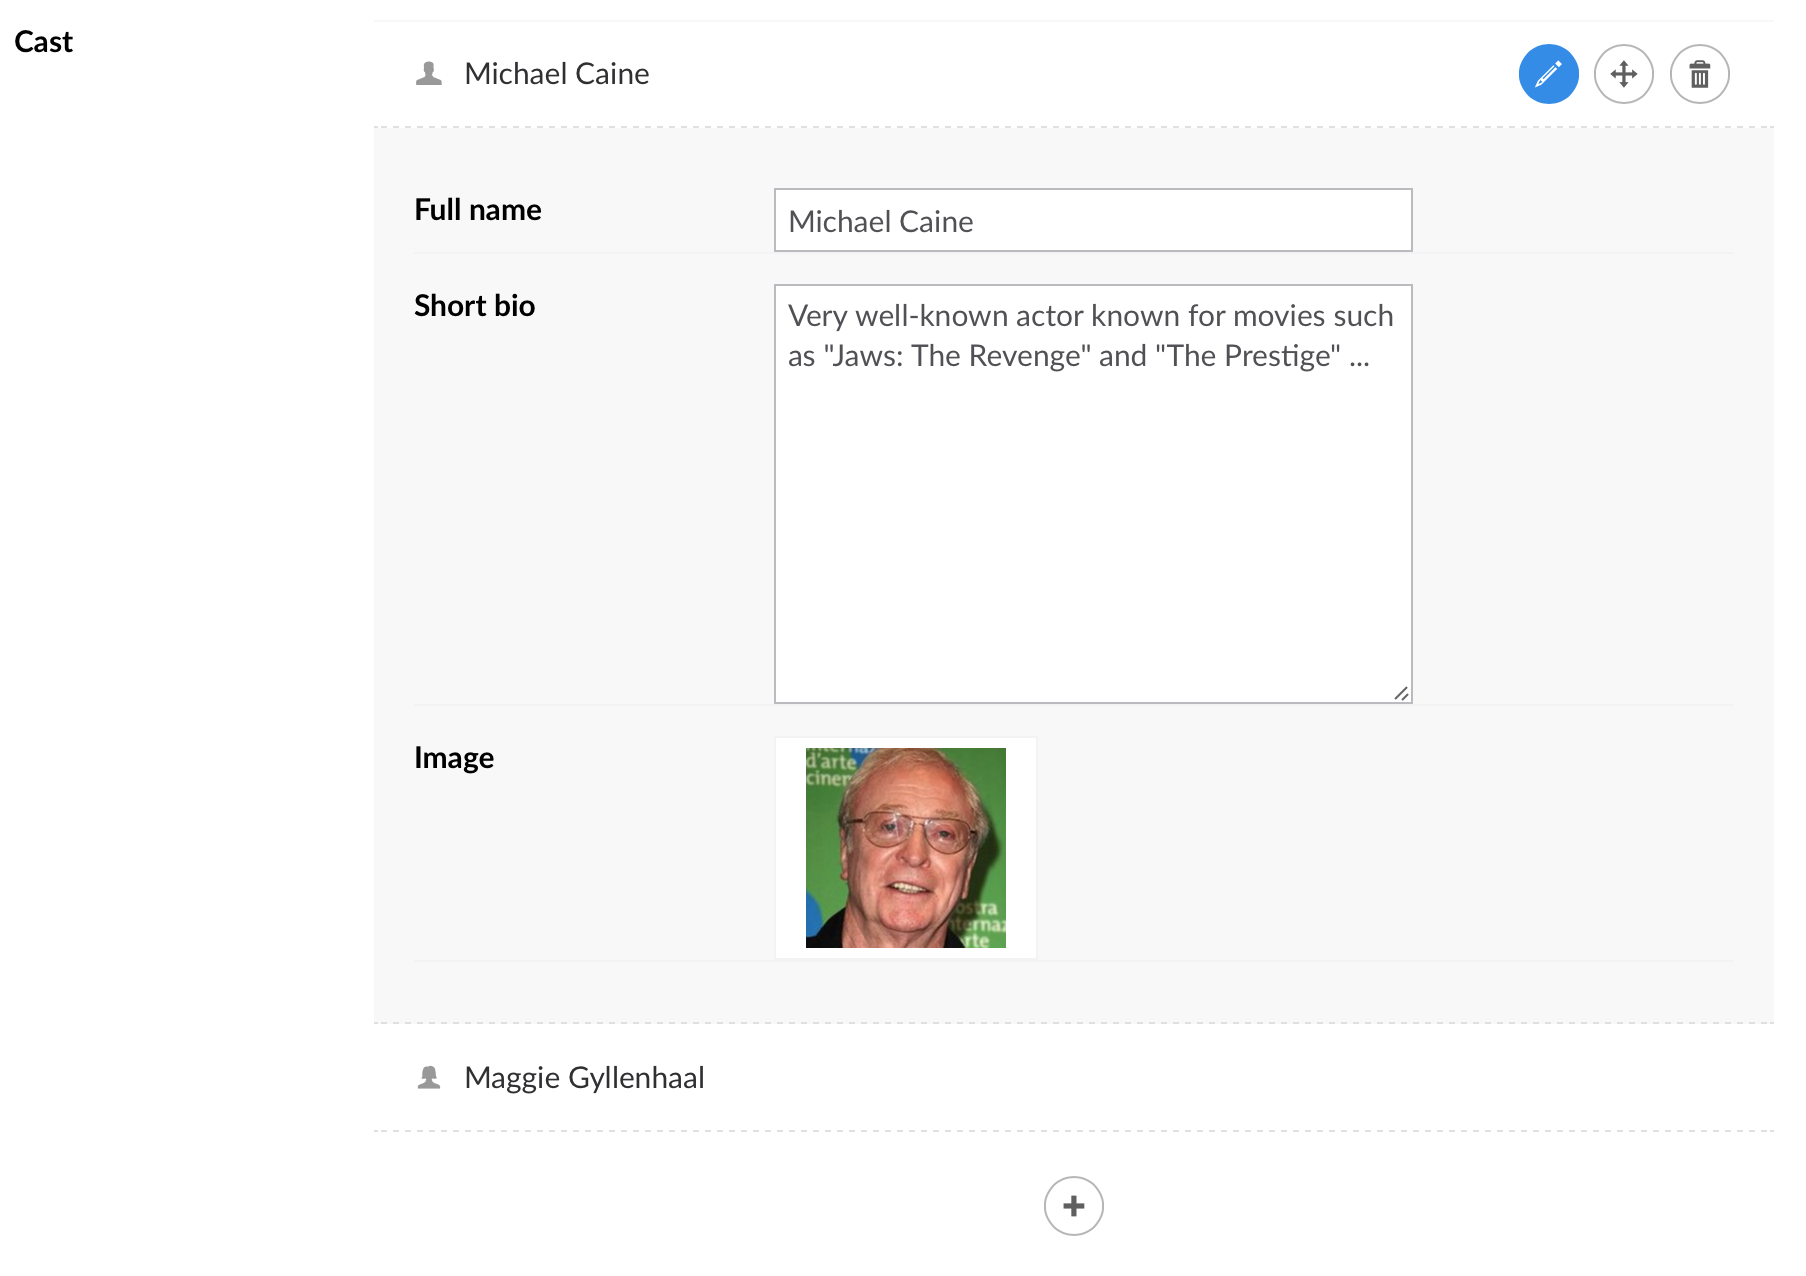
More items can be added to the list by clicking the plus icon for each additional item.
To close the editor for an item or open the editor for another item in the list, you click the edit icon.
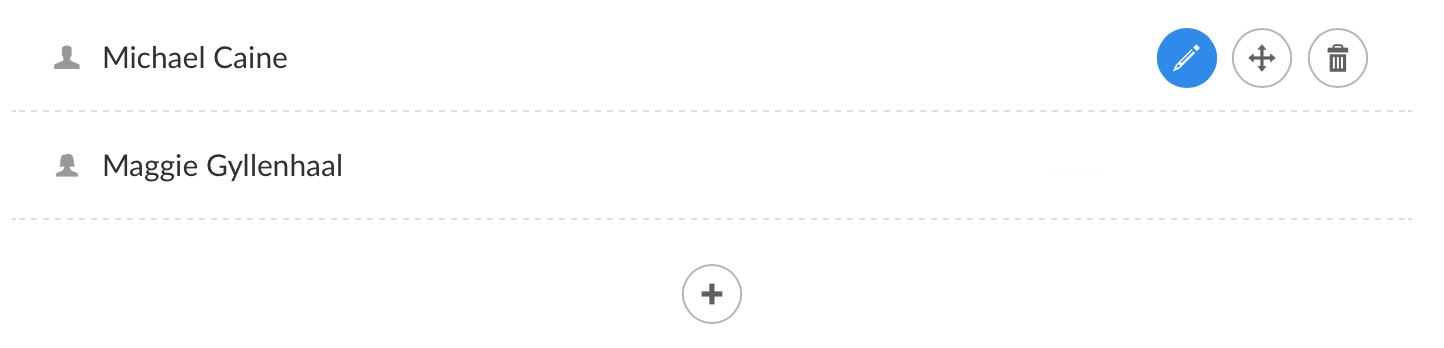
To reorder the list, click and drag the move icon up and down to place the items in the order you want.
To delete an item click the delete icon. If the minimum number of items is reached, then the delete icon will appear greyed out to prevent going below the minimum allowed number of items.
Single Item Mode
If Nested Content is configured with a minimum and maximum item of 1, then it goes into single item mode.
In single item mode, there is no icon displayed to add new items, and the single items editor will be open by default and its header bar removed.
In this mode, Nested Content works more like a fieldset than a list editor.
Rendering Nested Content
To render the stored value of your Nested Content property, a built in value converter is provided for you. Call the GetPropertyValue<T> method with a generic type of IEnumerable<IPublishedContent> and the stored value will be returned as a list of IPublishedContent entities.
Example:
@inherits Umbraco.Web.Mvc.UmbracoViewPage
@{
    var items = Model.GetPropertyValue<IEnumerable<IPublishedContent>>("myPropertyAlias");

    foreach(var item in items)
    {
        // Render your content, e.g. item.GetPropertyValue<string>("heading")
    }
}
Each item is treated as a standard IPublishedContent entity, which means you can use all the property value converters you are used to using, as well as the built-in @Umbraco.Field(...) helper methods.
Example:
@inherits Umbraco.Web.Mvc.UmbracoViewPage
@{
    var items = Model.GetPropertyValue<IEnumerable<IPublishedContent>>("myPropertyAlias");

    foreach(var item in items)
    {
        <h3>@item.GetPropertyValue("heading")</h3>
        @Umbraco.Field(item, "bodyText")
    }
}
Rendering Nested Content with custom templates
The example above is fine if you are outputting many of the same Nested Content type. However often you have a mix of different content types with different properties. Doing this gets confusing:
@inherits Umbraco.Web.Mvc.UmbracoViewPage
@{
    var items = Model.GetPropertyValue<IEnumerable<IPublishedContent>>("myPropertyAlias");

    foreach(var item in items)
    {
        if (item.HasProperty("bodyText"))
        {
            <p>item.GetPropertyValue("bodyText");</p>
        }

        if (item.HasProperty("slider"))
        {
            <div>item.GetPropertyValue("slider");</div>
        }
    }
}
Instead you can create a partial view for each block type, and then on the page view you can loop through all Nested Content elements and show each in their own partial view.
~/Views/Frontpage.cshtml
@inherits Umbraco.Web.Mvc.UmbracoViewPage
@{
    var items = Model.GetPropertyValue<IEnumerable<IPublishedContent>>("myPropertyAlias");

    foreach(var item in items)
    {
        var partialPath = string.Format("~/Views/Partials/NestedContentModules/{0}.cshtml", item.DocumentTypeAlias);
        @Html.Partial(partialPath, item);
    }
}
~/Views/Partials/NestedContentModules/newsItem.cshtml
@inherits UmbracoViewPage<IPublishedContent>

<h1>@Model.GetPropertyValue("newsTitle")</h1>
~/Views/Partials/NestedContentModules/blogItem.cshtml
@inherits UmbracoViewPage<IPublishedContent>

<h1>@Model.GetPropertyValue("blogTitle")</h1>
Single Item Mode
If your Nested Content property editor is configured in single item mode, then the value converter will automatically know this and return a single IPublishedContent entity rather than an IEnumerable<IPublishedContent> list. Therefore, when using Nested Content in single item mode, you can call GetPropertyValue<T> with a generic type of IPublishedContent and you can start accessing the entity's properties straight away, rather than having to then fetch it from a list first.
Example:
@inherits Umbraco.Web.Mvc.UmbracoViewPage
@{
    var item = Model.GetPropertyValue<IPublishedContent>("myPropertyAlias");
}
<h3>@item.GetPropertyValue("heading")</h3>
@Umbraco.Field(item, "bodyText")